Start Your Crypto Security Journey with Trezor.io/start 🚀
As the digital finance world grows, securing your crypto assets has never been more critical. Whether you're a beginner or a seasoned investor, Trezor.io/start is your gateway to bulletproof digital asset protection. This official onboarding platform from Trezor ensures you set up your hardware wallet the right way and begin using it with Trezor Suite, the trusted software companion for managing your cryptocurrencies securely.
In this blog, we’ll guide you through everything you need to know about Trezor.io/start, how to set up your Trezor device, and why Trezor Suite is the smartest tool for managing your crypto.
🔐 What is Trezor.io/start?
Trezor.io/start is the official onboarding page provided by Trezor, the pioneer in cryptocurrency hardware wallets. This page provides a secure and straightforward setup process for your Trezor device — whether you're using the Trezor Model One or the Trezor Model T.
Visiting this page ensures that you're following the most up-to-date, secure, and manufacturer-approved steps to initialize and use your wallet. It prevents the risk of falling for phishing websites or outdated instructions.
🛡 Why Choose Trezor? Unmatched Hardware Wallet Security
Trezor, developed by SatoshiLabs, was the world’s first hardware wallet and has remained a trusted name ever since. Unlike online wallets or mobile apps, Trezor stores your private keys offline, making it virtually impossible for hackers to access your crypto.
Key Benefits of Trezor:
- Offline storage (cold wallet) for maximum security
- PIN protection and passphrase support
- Support for 1000+ cryptocurrencies
- Integration with Trezor Suite for complete asset control
- Open-source firmware — transparency you can trust
With Trezor.io/start, setting up your Trezor wallet is not just safe but also incredibly simple.
🧭 Step-by-Step Guide to Using Trezor.io/start
Setting up your Trezor device through Trezor.io/start takes only a few steps. Here’s how to get started:
1. Visit the Official Setup Portal
Open your browser and go to Trezor.io/start. Always double-check the URL to ensure you’re on the official website.
2. Choose Your Trezor Model
Select either the Trezor Model One or Trezor Model T, depending on which device you have.
3. Install Trezor Suite
You'll be prompted to download Trezor Suite, the all-in-one app used to manage your wallet, send/receive crypto, and update firmware. We'll talk more about Trezor Suite shortly.
4. Connect Your Trezor
Plug in your Trezor device to your computer via USB. The Trezor Suite app will guide you through initializing your wallet.
5. Create a New Wallet or Recover an Existing One
If you’re new, choose to create a new wallet. You’ll be given a 24-word recovery seed — write this down and store it offline! If you're recovering a wallet, enter your recovery seed when prompted.
6. Set Up a PIN and Optional Passphrase
Enhance your wallet's protection with a secure PIN. Advanced users can also add a passphrase for layered security.
And just like that, your Trezor device is ready to use!
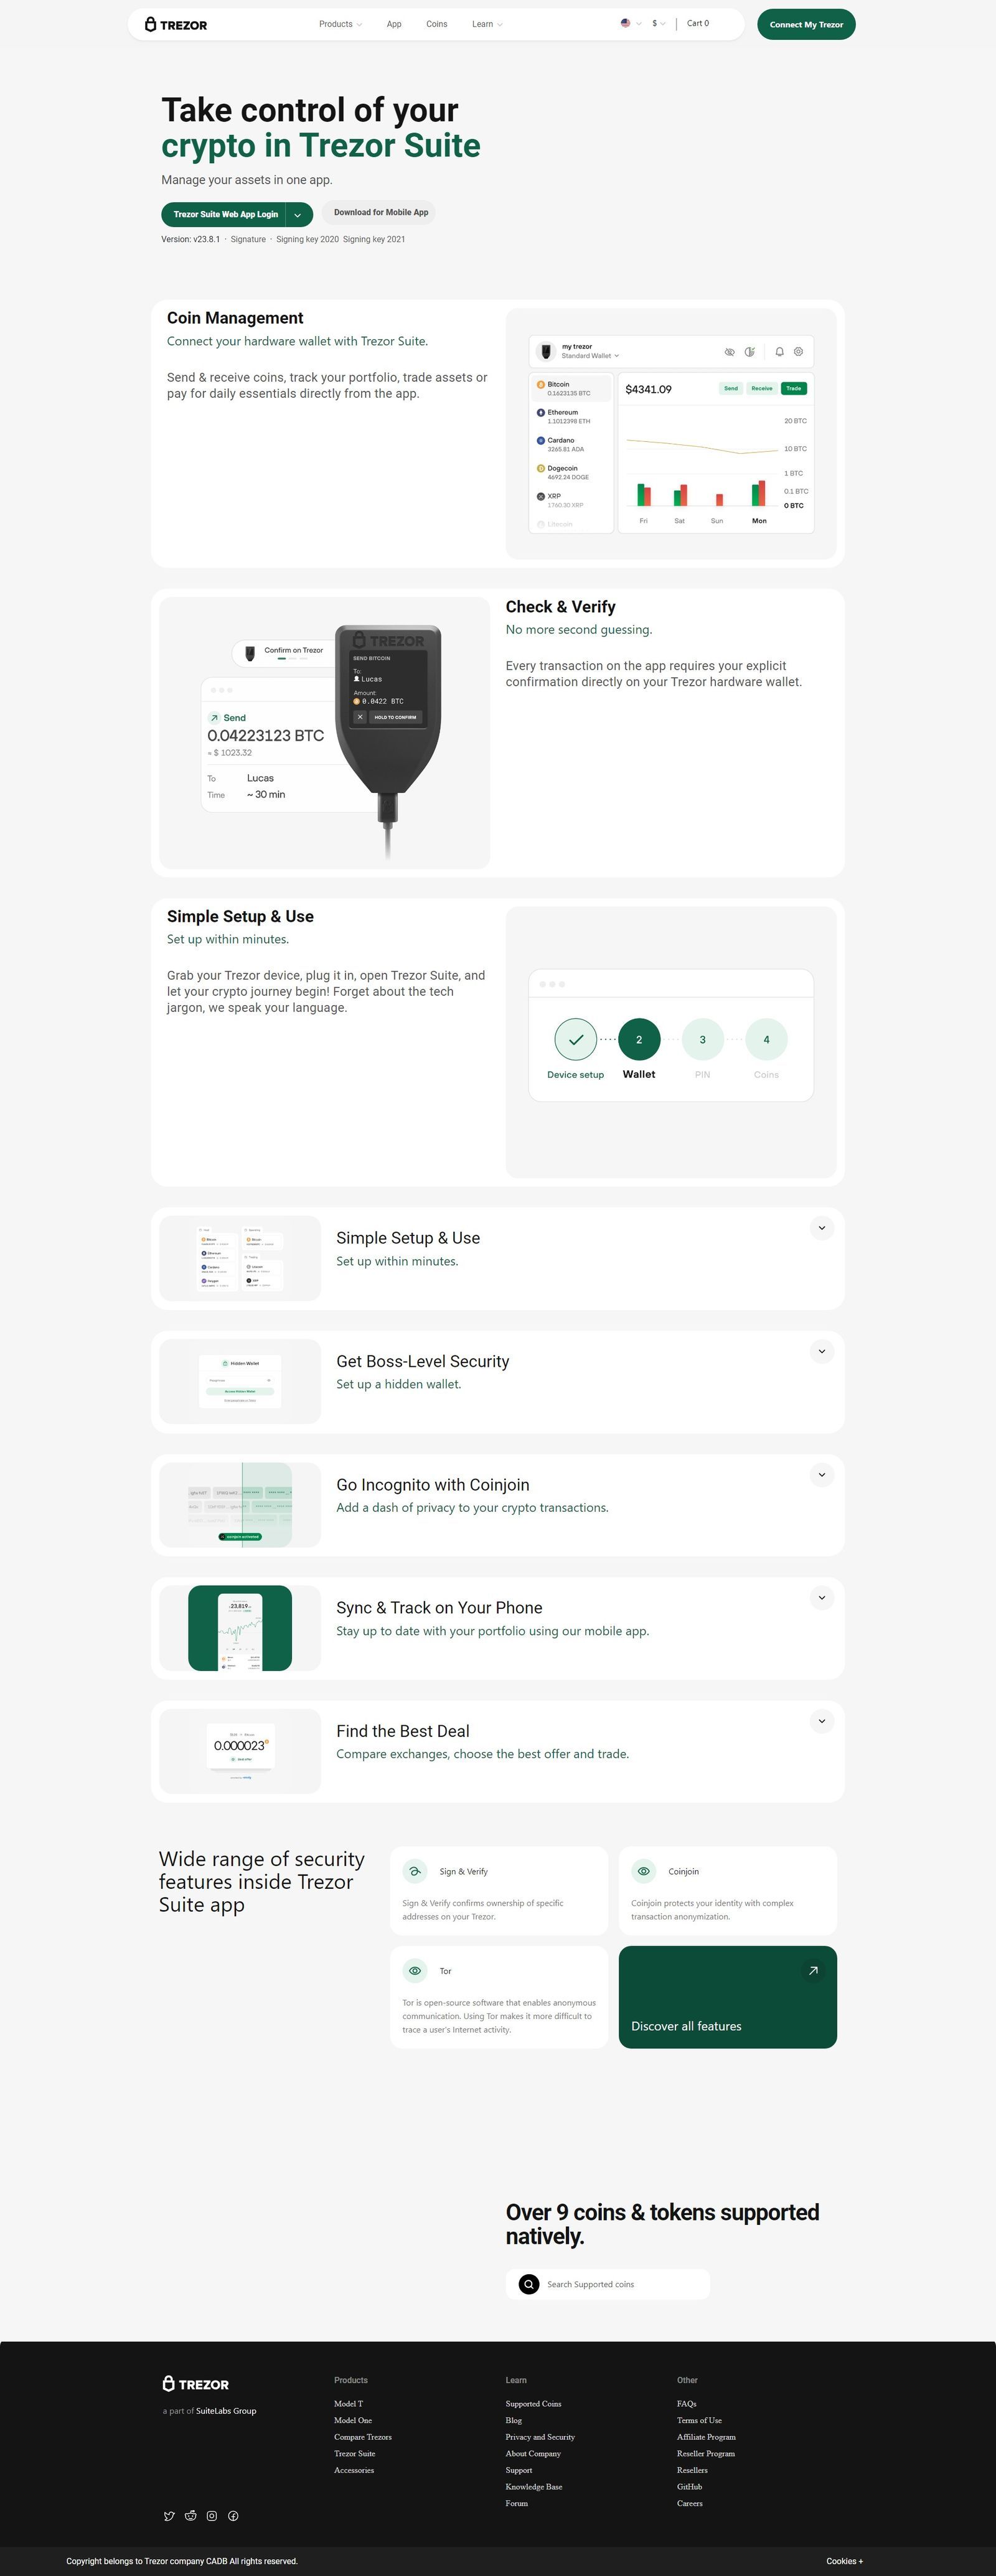
🧩 Trezor Suite: The Ultimate Crypto Control Center
The Trezor Suite is the official desktop and web application developed to work hand-in-hand with Trezor wallets. It acts as the command center for your digital assets, giving you total control and peace of mind.
Why Trezor Suite Stands Out:
- Easy-to-use dashboard with a clean interface
- Real-time balance and portfolio tracking
- Built-in exchange integrations
- Tor support for added anonymity
- Coin control and labeling features
- Regular security updates and enhancements
Trezor Suite allows you to not just store, but actively manage, send, receive, and exchange cryptocurrencies without ever exposing your private keys online.
🧠 How Trezor Suite Enhances Your Security
One of the core advantages of using Trezor Suite is how it ensures security without sacrificing usability. When paired with your Trezor device, all transactions must be physically confirmed on the device — a huge deterrent against remote hacking.
Key Security Features:
- Client-side encryption: Data never leaves your device
- Advanced privacy settings like disabling data collection
- Firmware verification before updates
- Auto-lock settings to prevent unauthorized access
Trezor Suite also helps you spot phishing attempts, alerting you if you visit a fake version of Trezor.io/start or other potentially dangerous sites.
💡 Pro Tips for Using Trezor.io/start Safely
- Bookmark Trezor.io/start to avoid phishing.
- Always download Trezor Suite from the official site.
- Never share your recovery seed with anyone — not even Trezor support.
- Store your recovery seed offline in multiple secure locations.
- Use a passphrase for extra protection (if you understand how it works).
🚀 Trezor.io/start is More Than a Setup Page — It’s a Mindset
The beauty of Trezor.io/start is that it doesn’t just help you install a device — it teaches you the importance of crypto self-custody. When you use a Trezor hardware wallet with Trezor Suite, you're not relying on third-party services or exchanges to protect your funds.
You're taking charge. You're becoming your own bank.
And in a world where crypto hacks and data breaches are common, that makes all the difference.
📱 What Devices and Coins Does Trezor Support?
Trezor wallets and Trezor Suite are compatible with major operating systems including Windows, macOS, and Linux. As for coins, both Bitcoin and Ethereum are supported, along with over 1,000 altcoins such as:
- Litecoin (LTC)
- Cardano (ADA)
- Dogecoin (DOGE)
- Monero (XMR)
- ERC-20 Tokens
- Solana (via 3rd-party apps)
Trezor Suite makes it easy to add and manage these coins under one dashboard.
🎯 Final Thoughts: Why Trezor.io/start is a Must for Every Crypto Holder
Whether you're investing ₹5,000 or ₹5,00,000 in cryptocurrencies, securing your funds should be your #1 priority. That’s where Trezor.io/start comes in. It’s the most trusted way to initialize your hardware wallet safely and begin using the powerful, secure Trezor Suite.
In just a few minutes, you can take total control of your digital assets, protect your financial future, and experience crypto the way it was meant to be — decentralized, private, and secure.
So don’t wait. Visit Trezor.io/start today and start your journey toward unmatched crypto security.
📚 FAQs
Q: Is Trezor.io/start safe to use? Yes! It’s the official onboarding portal by Trezor. Always double-check the URL to ensure you're not on a phishing site.
Q: Can I use Trezor Suite without a Trezor device? Trezor Suite is built for use with Trezor hardware wallets. Some features may work without a device, but full security requires a physical wallet.
Q: What if I lose my recovery seed? Your recovery seed is your backup. Without it, you cannot restore access. Always store it securely and offline.
Made in Typedream